 Grow Up Curious
 Light an LED together in 10 minutes.
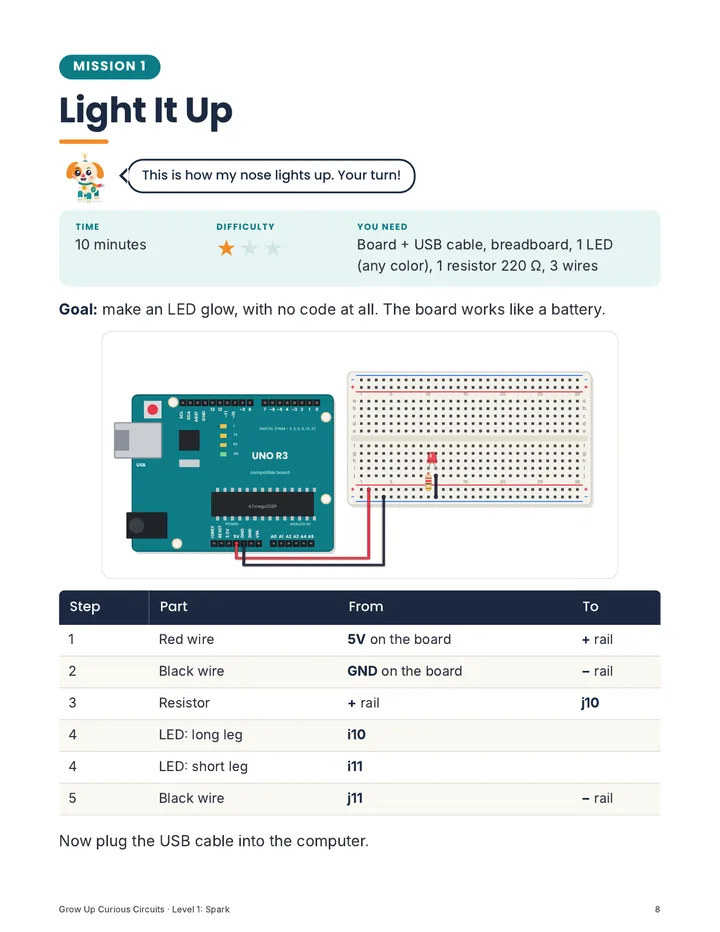
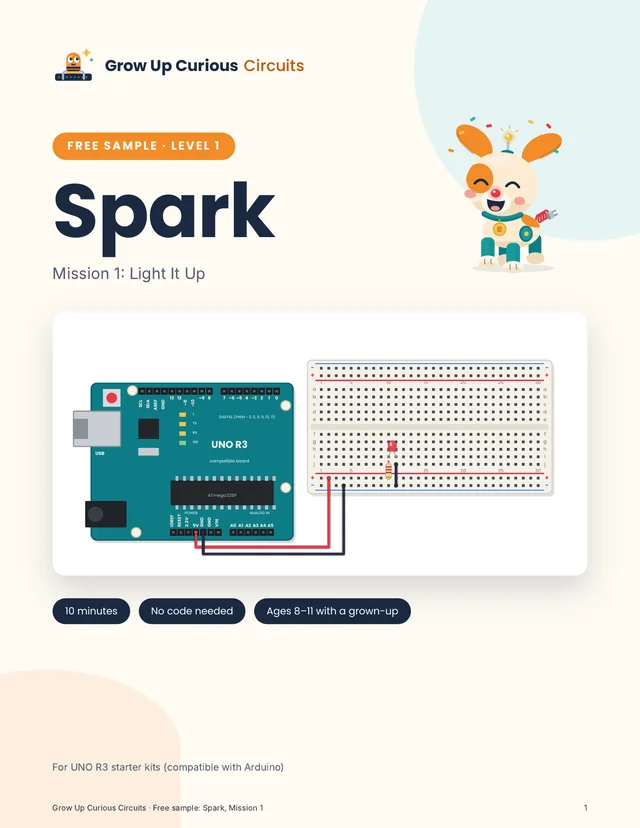
This is Mission 1 from Spark, our Level 1 guide, free. A picture of the breadboard and a table that says which hole every wire goes in. No code and no computer setup: the board only powers the circuit, so a USB phone charger is enough.
Free, for grown-ups. Confirm your email and your free guides open right away. By signing up, you agree to receive emails from Grow Up Curious (see our Privacy Policy). Unsubscribe anytime.
What's in the 9 pages
3 rules for builders
USB power only, unplug before changing wires, and every LED gets a resistor.
Meet the breadboard
How the holes connect inside, and how to find hole h10.
Mission 1: Light It Up
The parts, the wiring picture, the hole-by-hole table, a "Did it work?" check and a tip for when the LED stays dark.
Two pages of lab notes
Your kid predicts what will happen, draws the circuit, and writes down what happened.
For grown-ups: how to help
Read the steps out loud, let your kid do the plugging, and what to ask when it doesn't work.
What you need
- An UNO R3 board and its USB cable
- A breadboard
- 1 LED, any color
- 1 resistor, 220 Ω (red, red, brown stripes)
- 3 jumper wires
All of it comes in a standard UNO R3 starter kit. For ages 8 to 11 with a grown-up.
You'll also get Start Here, our free setup guide, for when your kid is ready to write code.
Send me Mission 1
Free. We'll email you the PDF, and you can print it or keep it on a tablet next to the breadboard.
Free, for grown-ups. Confirm your email and your free guides open right away. By signing up, you agree to receive emails from Grow Up Curious (see our Privacy Policy). Unsubscribe anytime.